Update: Added instructions for VS2015 (2016-07-16)
The last post was the introduction to the series of XLW related posts. Today I will describe how to set up a project with XLW. XLW comes with an installer that installs the project templates for your development environment. It is a quick way to start, but you don’t have much control over the process and the project template might not match your expectation on how project should be arranged.
XLW consists of the following components:
- Header files
- Static libraries (debug, release)
- InterfaceGenerator - an executable that takes a C++ header file that
contains special directives and creates a
.cppfile with code that interfaces your functions with Excel.
Project Setup
I will show how to set up for 32 bit Excel in Visual Studio 2013 Pro (and Visual Studio 2015). Set up for other environments should be similar.
1. Create a new workspace
-
Select menu:
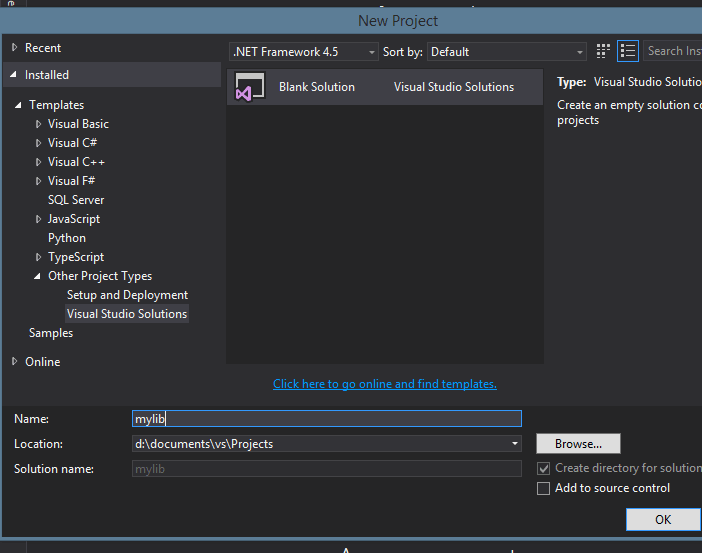
File->New->Project...:\

-
Select
Other Project Types->Visual Studio Solutions->Blank Solution. Set your workspace location, type namemyliband clickOKbutton :\
2. Create a new project in the workspace
-
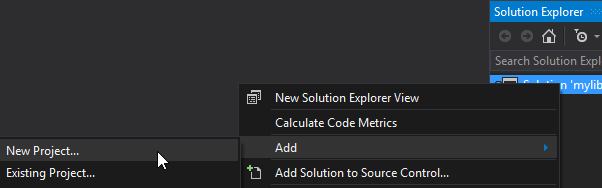
Right click on the
mylibworkspace in the Solution Explorer and selectAdd->New Project...:\
-
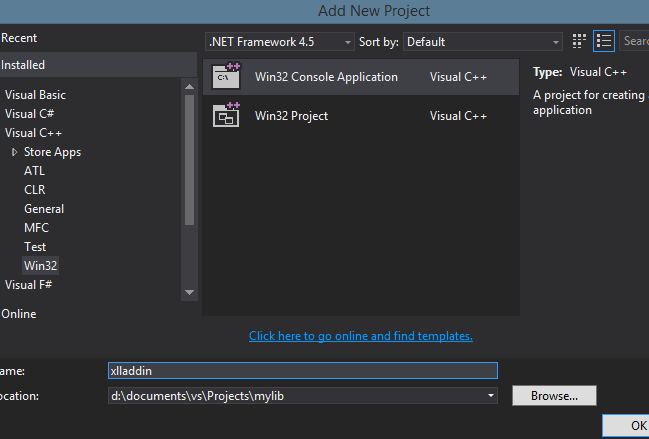
Select
Visual C++->Win32->Win32 Console Application, set project name toxlladdinand clickOK:\
-
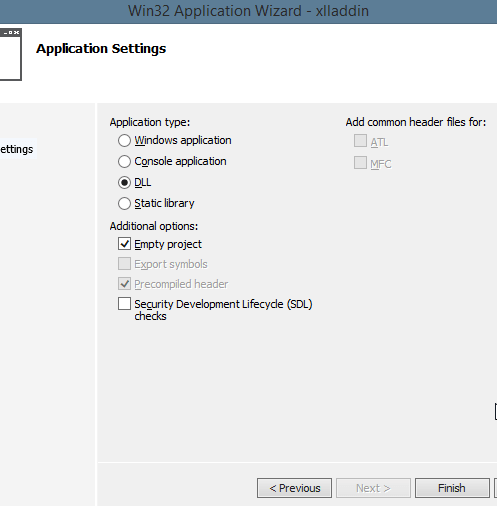
On the Overview page of the Win32 Application Wizard dialog box choose the
Nextbutton. -
On the Application Settings, under Application type, select
DLLand checkEmpty projectand pressFinishbutton:\
3. Download most recent version of XLW and add it to the project
-
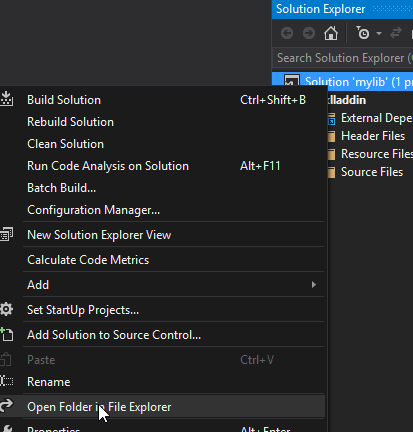
Right click on the solution in the Solution Explorer and select
Open Folder in File Explorer:\
-
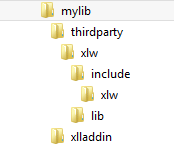
Create
thirdpartyfolder in themylibsolution folder. Then createxlwfolder inmylib\thirdparty. Createincludeandlibfolders inmylib\thirdparty\xlw. Finally createxlwfolder inmylib\thirdparty\xlw\include\xlw:\
-
Head to XLW download page and download the most recent version of XLW, but do not install it.
-
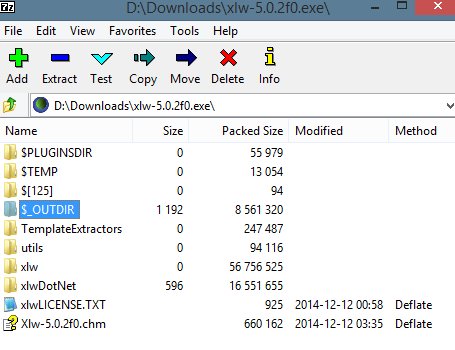
Use 7z to open the downloaded file as an archive:\
-
Copy header files from the archive’s
$_OUTDIR\xlwfolder tomylib\thirdparty\xlw\include\xlw. -
Copy library files from the archive’s
xlw\libfolder tomylib\thirdparty\xlw\lib. Select library files that correspond to your environment. In the case of Visual Studio 2013 you need to choose files that start withxlw-vc120-mt: *xlw-vc120-mt-5_0_2f0.lib*xlw-vc120-mt-gd-5_0_2f0.lib*xlw-vc120-mt-gd-5_0_2f0.pdb -
At this moment the distribution does not contain libraries for Visual Studio 2015. You can download 5.0.2 version from here (together with Visual Studio 2013 libraries and include files and
InterfaceGenerator.exe). -
Rename these library files to remove version (
-5_0_2f0) from their names. This will enable you to update to a new version by just replacing the files without modifying solution build settings. I also create file with name corresponding to library version, so it is easier to track versions. I.e. I put5_0_2f0.txtinlibfolder. -
Finally copy
InterfaceGenerator.exefrom the archive’sxlw\build\vc12\Releasefolder tomylib\thirdparty\xlw.
4. Configure build for All Configurations
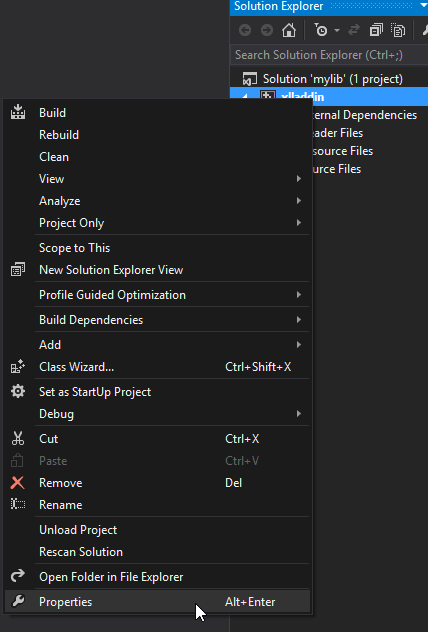
Right click on xlladdin in the Solution Explorer, select Properties:\
 \
\
Then select All Configurations:\

-
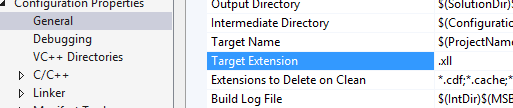
On the Configuration Properties/General sheet set
Target Extensionto.xll:\
-
On the Configuration Properties/Debugging sheet set:\

-
CommandtoOFFICE_PATH\excel.exe(whereOFFICE_PATHis a path to your installation of Microsoft Office (in my case it isC:\Program Files (x86)\Microsoft Office\Office15\EXCEL.EXE) -
Command Argumentsto$(TargetPath)
-
-
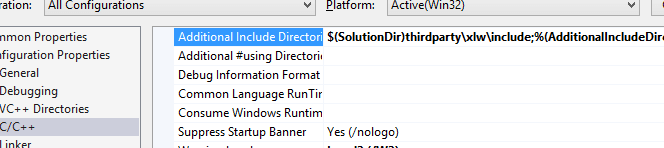
On the C/C++ sheet (Note: if you don’t have this sheet add an empty
mylib.cppfile to your project) setAdditional Include Directoriesto$(SolutionDir)thirdparty\xlw\include;%(AdditionalIncludeDirectories):\
-
On the Linker sheet set
Additional Library Directoriesto$(SolutionDir)thirdparty\xlw\lib\;%(AdditionalLibraryDirectories):\

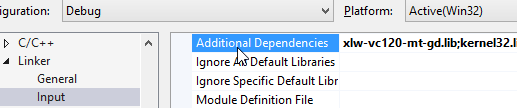
5. Configure build for Debug
Select Debug configuration:\
 \
\
Add xlw-vc120-mt-gd.lib (xlw-vc140-mt-gd.lib for VS2015) to the
Additional Dependencies on the Linker->Input sheet:\
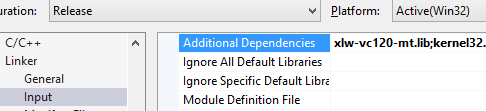
6. Configure build for Release
Select Release configuration:\
 \
\
Add xlw-vc120-mt.lib (xlw-vc140-mt.lib for VS2015) to the
Additional Dependencies on the Linker->Input sheet:\
7. Add initial content
-
Create three empty files in the
xlladdinproject folder:mylib.hmylib.cppxlwmylib.cpp
-
Add the following content to
mylib.h:#ifndef _mylib_h_ #define _mylib_h_ #include <xlw/xlw.h> //<xlw:libraryname=MyLibrary double //Square root of an argument MySqrt(double x //argument ); #endif -
Add the following content to
mylib.cpp:#include "mylib.h" #include <math.h> double MySqrt(double x) { if( x < 0. ) { throw("#Negative argument"); } return sqrt(x); }
8. Set up custom build step to generate xlwmylib.cpp
-
In the Solution Explorer right click on
mylib.hand selectProperties -
In the properties dialog box set configuration to
All Configurations:\
-
On General sheet set
Item TypetoCustom Build Tooland hitApply:\

-
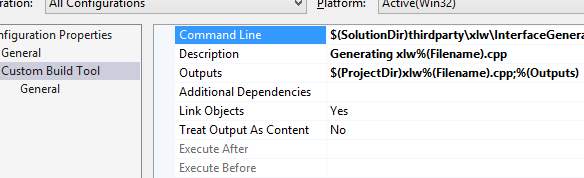
On Custom Build Tool sheet (which appears after you hit
Applyin the previous step) set the following (also make sure that the configuration is still set toAll Configurations):\
-
Command Lineto$(SolutionDir)thirdparty\xlw\InterfaceGenerator.exe %(FullPath) -
DescriptiontoGenerating xlw%(Filename).cpp -
Outputsto$(ProjectDir)xlw%(Filename).cpp;%(Outputs) -
Execute BeforetoPreBuildEvent(this might be grayed out. Look at next step)
-
-
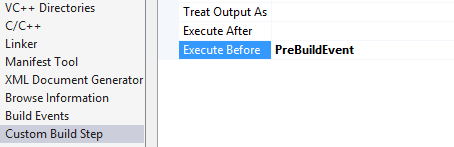
If you were not able to set
Execute BeforetoPreBuildEventon the Custom Build Tool page for themylib.hfile open Properties dialog for thexlladdinproject (right click on it and selectProperties), and then head to the Custom Build Step sheet. SetExecute BeforetoPreBuildEvent:\
9. Test addin creation
-
Set to reload files in Visual Studio automatically. Click on main menu ‘TOOLS’ -> ‘Options…’ and check
Auto-load changes, if savedon the Environment/Document sheet:\

-
Press
F5- the addin will be compiled and loaded in Excel (accept Excel’s security warnings by pressingEnable the add-in for this session only). If you see an error that the file’s content is not recognized - you are trying to open your 32 bit addin in 64 bit Excel. -
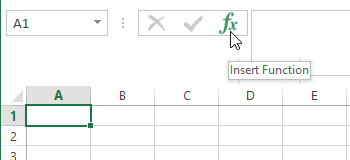
Create a new spreadsheet and go to the Funciton wizard:\
-
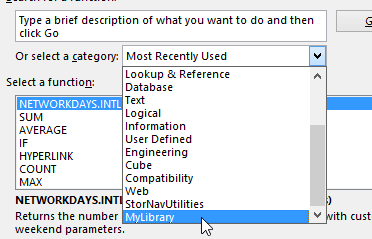
Find MyLibrary:\
-
Select MySqrt function and put
3as an argument. -
Save spreadsheet and exit Excel.
10. Debugging
-
Press
F5- Excel will start and load the addin. -
Open the spreadsheet saved in previous section.
-
Put a breakpoint on
if(x < 0.)line inmylib.cpp -
Select a cell with
MySqrtfunction and pressEnterto run it. -
The code will stop on the breakpoint.
11. Happy coding!
If you don’t have patience to go over these steps, just
download the mylib solution
(or VS2015 version), open it in
Visual Studio and press F5 key. If your Excel is not installed in
C:\Program Files (x86)\Microsoft Office\Office15\EXCEL.EXE you will need
to adjust the path as described in
Section 4.